Saturday, July 14, 2012

Pallet table

Have you been hit by pallet love?  I am intrigued for sure.  I was inspired by  this picture from Homedit.com found on Pinterest one day.  It has (21) great ideas for turning pallets into unique pieces of furniture.  I knew there was something on here I could make.  I like this deck table immediately!


So my sister and I visited the local lumber yard and found two nice size pallets that would be great for this project.  So far so good.  I don't have wheels and they cost a fortune to purchase new, so that will be a later addition once they're found at bargain prices somewhere. 


I also asked the nice young man at the lumber yard if there was any scrap wood available.  He found a piece of 4x4 all warped up.  He said I could have any amount I wanted.  HA!  I asked him if he could cut it into the pieces I needed.  He said sure thing.  Now that's awesome service!!   I asked for 4 four-inch pieces and 4 six-inch pieces.  And before we could run to the car and drive it by for pick-up, he was done cutting.  Beautiful!


I don't have any pictures of the construction, but it's pretty straight forward.  Plus it was about 100 degrees that day and I wasn't gonna fool around with much more that the assembly.  We used a drill and found some screws in my garage and came up with a plan that proved to be pretty sturdy.  We simply screwed the legs onto the pallets in the corners.  


We hauled it to my back deck and put it in place.  I had a typical rectangle poly-top table with 4 chairs around it, the kind an umbrella fits in.  Only we didn't have an umbrella cuz our lower deck is pretty shady.  We never used the table, so it was time to replace it with something a little more unique and funky. 

I found the two chairs at a garage sale for $2 each.  Couldn't pass them up.  One needed a bit of TLC and some wood glue, but really I just tightened up all the screws and they were good to go.  I found 8 12x12 pieces of creamy white tile for $2 at another sale.  (Shopping at garage sales never gets old!)  I planted some flowers in a planter for my centerpiece and there you have it.  (I plan to replace the blue pillows with real chair cushions and some pretty red leafy outdoor fabric, but they're not sewn yet.) 

It's a whole new look for my deck at the stellar price of $6.  Yeah, I can really enjoy that!
  

Thursday, July 12, 2012

Old Spring Mattress

I have two neices, Gretta and Shiloh, who were throwing a party to celebrate their high school graduation.  As with most parties of this magnitude, many home improvements were completed. 

Their mom (and my sister), Sandy, was in charge of the master list of improvements.  She did a bang up job keeping us on our toes in preparation for this party.  Here's one of her ideas that we put together.  


We found two old spring mattresses at a garage sale last summer for $2 each.  We didn't have a specific use for them, but we had some cool ideas.  This was not one of them at the time.  But, look how great it is!!


Sandy happens to buy koozies all the time and has quite a collection of them.  She thought it would be great fun and look so appealing to hang the koozies with a clothes pin on these spring mattresses.  Her guests could pick which ever one they wanted to use and replace it when they were finished with it.  It turned out to be a fun conversation piece and added a funky look to the party, not to mention its functionality. 


The next time you see a spring mattress (or another great piece) for a bargain, pick it up and take it home with you. 
A great idea might strike when you need it most, and you'll be ready!   


Tuesday, July 3, 2012

Chic chandelier

It isn't everyday that all the stars align and you find yourself pinching yourself to be sure the day is real.  While most of Sarah's bedroom is completed, there are a few small changes that we are still working on.  One of these changes is the lighting.  Sarah's been saying for months that she would L.O.V.E. a chandelier-type ceiling fixture.  The ceiling fixture there now is the generic light that the builder installed 12 years ago.  So we've been on the lookout. 


I was told one day by my sister, Sandy, that I needed to visit the Young Life garage sale in town to check out a really cute red lamp for my living room.  (She knows I'm trying to accent my living room with orange and/or red.)  So, I made a visit to the garage sale and found the lamp and loved it!!  I wondered around the space to see if there was anything else I couldn't live without.  Low and behold, I looked down and saw this fixture that has golden yellow glass, held it up and saw to my amazement that it was a chandelier; probably from someone's dining room.  The price tag: $3.  So that came home with me too.  When I showed it to Sarah, she fell in love with it instantly.


My husband did the rewiring work and after about 1/2 hour, it was hanging beautifully in Sarah's room.  It's gorgeous!  It gives this charming underwater-like effect to the ceiling.  It really changes the whole look of the room.  In fact, I'd say it completes it.  We laid on her bed for a few minutes admiring it, welcoming it, celebrating it. 


Yes, I love those days when things fall into place so nicely. 
 Here's a new look at her bedroom with the chandelier. 
So pretty. 
So perfect. 


Wednesday, June 20, 2012

Sarah's bedroom makeover

There's something about a room makeover that's really exciting.  All the dreaming, thinking, creating, wondering.  What does one do with a blank canvas?   Well, Sarah wanted something bright and pretty and uncluttered, with only a few of her favorite things in it.  That's a great start! 

Here's where we started:  a tribute to Audrey Hepburn, two Jack Vettriano prints, album covers of her favorite musicals.  Those are the highlights.  A red accent wall with yellow gold on the other three walls.  A really good looking room, I have to admit.  She enjoyed it for eight years. 


We moved everything out of the bedroom and took everything off the walls.  This is when the FUN began.  We needed inspiration.  A few hours on Pinterest and a few trips to several local stores gave us some direction.  A road trip to IKEA in Chicago proved to be our true inspiration. 
IKEA has so much to buy look at. Three hours later, we had lots of good diy ideas and two purchases: a new duvet and cases in gray and white and pretty white tone on tone panels for the window.  Simple.   Very good choice.  We can go anywhere with this print.   Sarah decided on the classic and popular gray and yellow color scheme.  I concurred.   The duvet print is on the left.  We stopped at a fabric store to see what options we had for pillows.  (Do you know the price of decorative pillow these days?)   The gray in the middle is for the headboard and the leafy yellow/gray print is the first choice for sham covers.   A really lovely start!

We wanted to situate the bed under the window, so it would be the first thing one sees when entering the room - the focal point.  This means, however, we can't use the headboard that comes with the bedframe.  So, we thought it would be fun to make a headboard...a floating headboard.

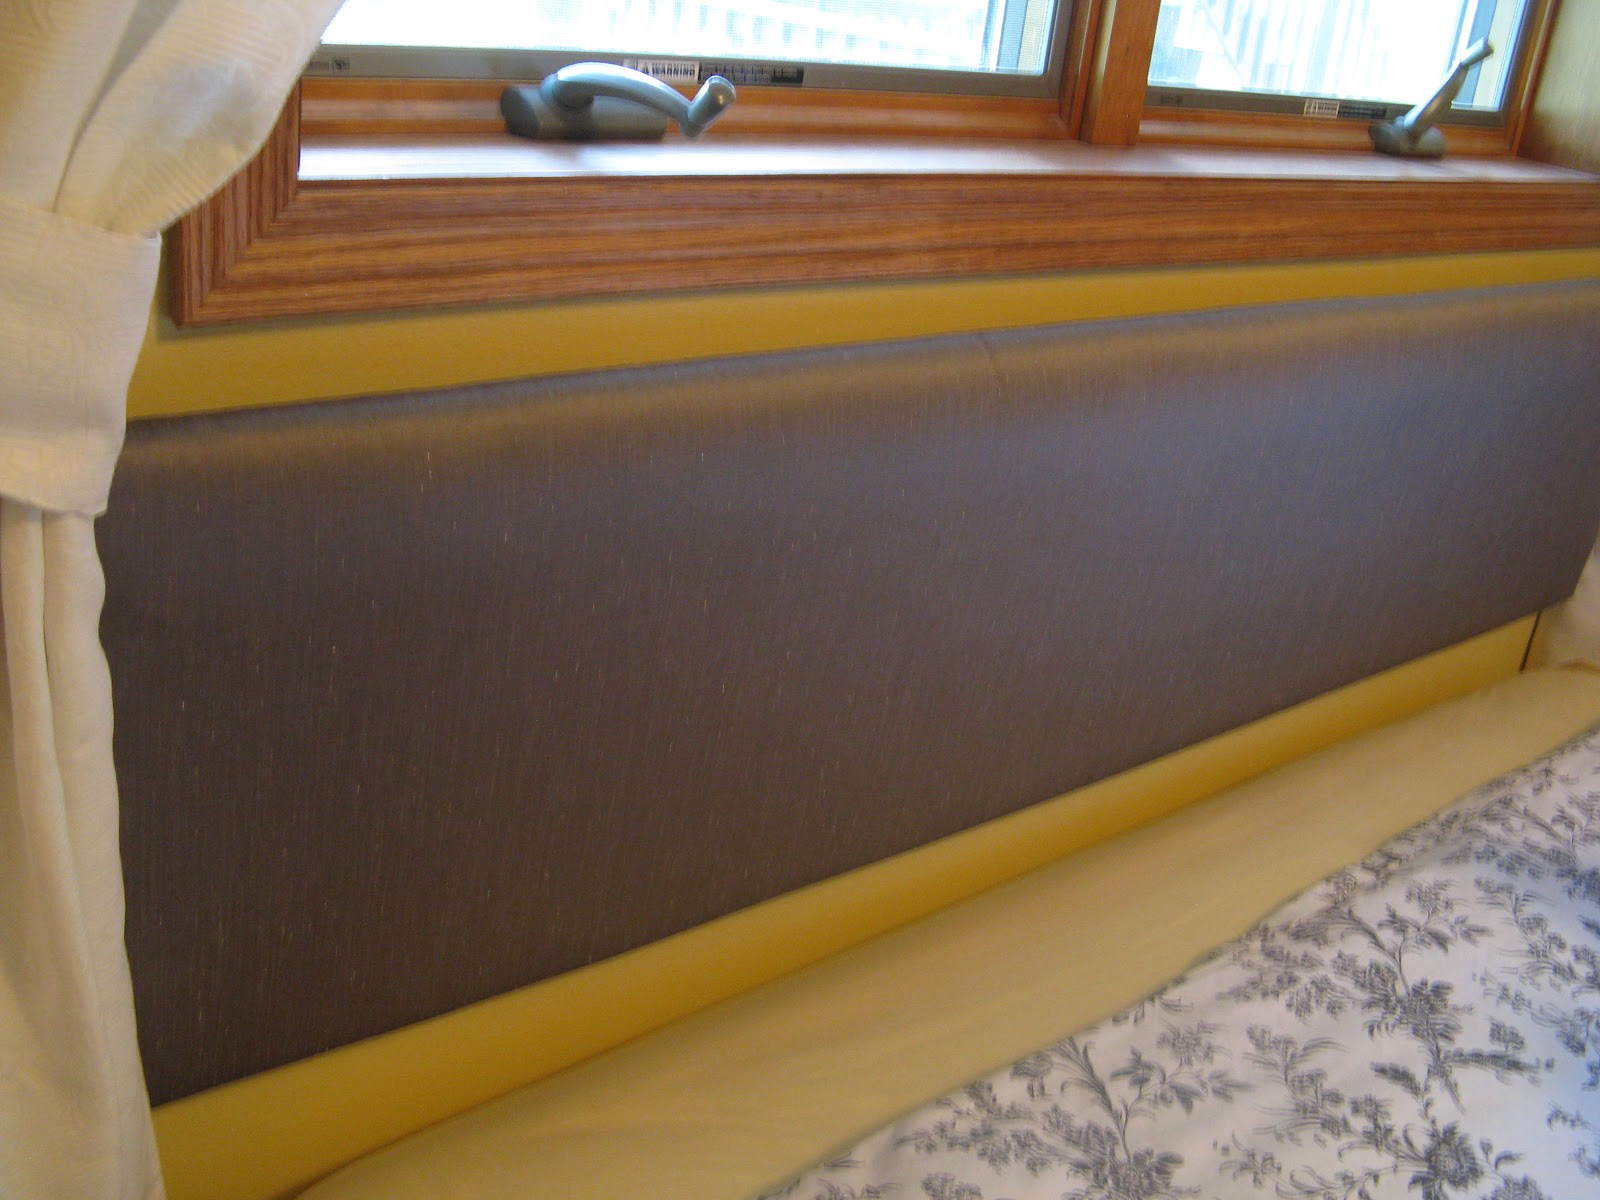
I found a piece of plywood that was the right size (! how often does that happen?)  I had some left over random pieces of quilt batting that we used to cover the board with a staple gun.  I was glad Sarah liked to do this part. 


We covered it with the silvery gray material and stapled it all again.   


Looking pretty good!  We used four 2x2 deck spindles on hand to attach it to the wall.  We grouped all four together and did some measurements so they are centered.  We screwed the top and bottom one to the headboard and the middle two to the wall.  Then we put the headboard on the wall and screwed the top 2x2 on the headboard to the top 2x2 on the wall.  We did the same with the bottom.  Worked like a charm!  It provides a little space away from the wall which we like and everything is hidden.  A floating headboard...done!


Next, pillows!  Shams and other kinds.  We found lots of fabric that we couldn't live without. 
From this...

...to this!!  


Lots of cutting, pinning, ironing, and sewing in the next few days.  But so worth it!  Look at Sarah's bed.  Isn't it beautiful!  We love it! 

We had a lofty thought after shopping at TJ Max one day.  They had a pretty tone-on-tone wallpaper on their walls (notice it the next time you shop there).  We thought the same look would seal the deal with the walls.  Something subtle and pretty.  We found a stencil at Wisconsin Craft Mart and bought a quart of saffron yellow paint (two shades darker than the wall paint) in preparation. 

Well, we were LUCKY one day when we showed a friend (thanks, Tasha) the room and shared with her our plans for the stencil and she gave us another idea she saw a friend do (thanks, Nicole).  Instead of stencilling the whole wall, why not just do a couple of pieces of wood and hang them up for art.  I had thrifted from St. Vinny three square canvasses one day for a future project.  Well, that project just arrived. 


Three coats of saffron yellow paint later they were prepped for stenciling. 


We purchased charcoal gray and metallic gray acrylic paint from the local World of Variety for the stencilling.  We used both colors on each stencil to create some visual movement.  We REALLY liked this project.  It was time consuming and kinda puttsy (but remember, I like puttsy). 


We stenciled two canvasses like this.  The third canvas was used for a quote.  Hmmm, what profound words to use?  There are soooooo many good ones.  Sarah and I were listening to music one crafting day and we heard a song from the musical GIGI.  (It might be available on netflix for your immense enjoyment.)  There is a line in that song that Sarah picked out for her quote: "Oh, what miracle has made you the way you are."  Isn't it sweet!?  So, that's what went on the third canvas.  Of course, I made the stencils with my CRICUT. 


Here they are on her wall...pretty spectacular!  (Sorry for the glare.)


As you might know by now, Sarah loves musicals.  We found an old record player at a garage sale so she could play these old albums.  We scout for them at thrift stores whenever we can.  She has a nice collection of albums and we listen to them pretty often.  Anyway, she wanted to promenently place the records and the player in her room.  We had a nice naked wood stand that was perfect for this
display.  We primed and painted it white to match the other furniture pieces in her room. 


Look how awesome it looks! 


And finally, the dresser.  The only piece of furniture to return to the room.  It's IKEA.  We put up the shelving for books instead of one on the floor.  The sign on the top shelf says:
Life does not have to be perfect to be wonderful! 
How true. 

So, there you have it.  A month or two later, it's finished.  It was really fun to do with Sarah.  I loved our time together.  Sarah loves how bright it is and simple to clean and manage.  It was fun to do and so worth it. 
I hope you have the time and energy this summer to makeover a room that is ready for a new look.  Sometimes it's just a good cleaning and simplifying, clearing out clutter and sorting through books and knacks.  Sometimes, it's just a new color on the walls or new pillows. 

I'm inspired now to repaint my living room and give it a new, fresh update.  I'll let you know how that goes. 

Happy summer!! 


Monday, May 21, 2012

Rustic wooden tray/planter

I was a bit restless this past weekend and went wondering around my house waiting for inspiration to hit.  I have several potential projects stashed in the garage, so I took a stroll out there.  I found a footstool in desperate need of a remake.  It's been there for awhile and looked somewhat forlorn so I chose it.  Here's a before picture of the footstool as I'm ripping off the bottom cover and eventually all the sides, top and guts.


Pretty good bones.  Except for the nail holes and glue everywhere. 
The feet are in great shape with only a few knicks here and there.  

Here are the layers and layers that came off, along with about a gazillion upholstery nails.  If I had the right tools it would've been quick(er) work.  I was happy to have the demolition mostly over without any blisters.  We'll see how long that lasts.   


I removed the legs and will use them on a different remake.  The wooden frame is so rustic that the two finishes didn't work together.  No biggy.  I was hoping the sanding would remove more of the dried on glue, but there was alot of it left.  It was at least smooth to the touch which is good enough.   I actually flipped the stool over, so the bottom is now the top.  That gave me a flat bottom to nail on the 1/4 inch plywood.  


I glued pieces of twine on the top of each board on the rounded sections to cover up the old glue add some interest and I drilled holes in the sides to wrap smaller twine to reinforce the big twine on top. 


Isn't this a cute look?  I like it alot, I gotta say. 


This is a view from the side.  


This is just a picture of the twine I used and wood glue.  I don't know if that's the right kind of glue to use for this project, but it's what was on hand.  Isn't that how it goes sometimes? 
I can hear the wise words of Tim Gunn right about now.  "Make it work." 


I drilled two more holes on the sides for twine handles for easy moving. 
 Looks even cuter now, me thinks!


This is the inside where I tied the knots for the handles. 


I put it outside on the deck for now.  I will probably find the perfect spot for it in a few days.  It's really rustic looking.  Maybe I'll fill it with impatiens or pansys planted in terra cotta pots.  It would be fabulous as a tray on stacked pallets, too.  I might end up painting it. 
Who knows?  Whatever it ends up being is okay with me. 

 I hope there will be more days like this one, remaking a piece of junky old furniture into something that's unique and functional again. 

In my book, nothing much beats that!  

Tuesday, May 15, 2012

Corks Galore!

My last visit to Emily's house brought a new project for her home.  I brought with me a big bag of corks (that my sister, Sandy, rounded up from the local winery) to do something with.   Emily's been collecting them.  Her friends have been collecting them for her.  So, I added my bag to hers and we were swimming in corks. 

We decided to make a word sign for the space above her kitchen cabinets.  This is where she has been displaying her empty wine bottles.  She had quite a collection (!)  We sorted and saved only her favorite wine bottles.  The cork sign would be placed among these.  The word we chose - ENJOY. 

We played around with different sizes, different looks and it came down to these two:

 Then we had to find the board in her very limited wood pile.  Not much to choose from, but we found a piece of plywood that would work.  I guess one has to live in one place for a while to be worthy of a decent wood pile.  I have one, but it could be better.  You can bet I try hard to bring home free, random scrap pieces of wood to my garage for future use.  Some of my findings are in my sister's attic for safe keeping (and hiding). 

We thought the natural color of the plywood would blend in too much with the wall color, so we painted it brown.  Again, not a stock pile of paints to choose from.  We used one of those little bottles that cost .99.   We used it all.   Emily will have to deal. 


We watched the paint dry, cuz we were so eager to begin gluing the corks to the wood.  A bit tedious, but we were ready for tedious work to see this project on the wall.  Of course, tedious work is always more fun with a glass of wine.  We had to taste Emily's new favorite wine (again). 


Emily even picked out her favorite corks!  Who can remember which cork came from which wine?  Evidently, some names make their corks recognizable and save-worthy.  She especially liked the corks with the house on them.  We also liked using the corks from red wines that have colored the corks red, pink, or purple.  Makes sense, but not something I noticed before.  Only when one is looking at hundreds of corks does one see the difference in their color and shape.


We eye-balled the placement for each letter.  We both have pretty good eye-balling skills.  A ruler or string would've been a good idea, but we were on a roll, in the zone, having a good time. 
Who neede extras steps!


Here's the final project in place.  It looks pretty good!  Adds a little corky fun to her home. 


She has enough corks left for some other fun project.  I'll be seeing her again in July.  Who knows what will come of them.  I'll let you know whatever it is.   In the meantime...enjoy!